
1、查看当前内核版本
[root@localhost ~]# uname -r
3.10.0-327.el7.x86_64

[root@localhost ~]# uname -a
Linux localhost.localdomain 3.10.0-327.el7.x86_64 #1 SMP Thu Nov 19 22:10:57 UTC 2015 x86_64 x86_64 x86_64 GNU/Linux

[root@localhost ~]# cat /etc/redhat-release
CentOS Linux release 7.2.1511 (Core)
2、升级内核
更新yum源仓库
$ yum -y update
启用 ELRepo 仓库
ELRepo 仓库是基于社区的用于企业级 Linux 仓库,提供对 RedHat Enterprise (RHEL) 和 其他基于 RHEL的 Linux 发行版(CentOS、Scientific、Fedora 等)的支持。
ELRepo 聚焦于和硬件相关的软件包,包括文件系统驱动、显卡驱动、网络驱动、声卡驱动和摄像头驱动等。
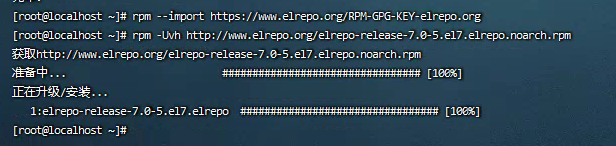
#导入ELRepo仓库的公共密钥
rpm --import https://www.elrepo.org/RPM-GPG-KEY-elrepo.org
#安装ELRepo仓库的yum源
rpm -Uvh http://www.elrepo.org/elrepo-release-7.0-5.el7.elrepo.noarch.rpm
3、查看可用的系统内核包
可以看到4.4和4.18两个版本
yum --disablerepo="*" --enablerepo="elrepo-kernel" list available

4、安装最新版本内核
$ yum --enablerepo=elrepo-kernel install kernel-ml
--enablerepo 选项开启 CentOS 系统上的指定仓库。默认开启的是 elrepo,这里用 elrepo-kernel 替换。
5、设置 grub2
内核安装好后,需要设置为默认启动选项并重启后才会生效
查看系统上的所有可用内核:
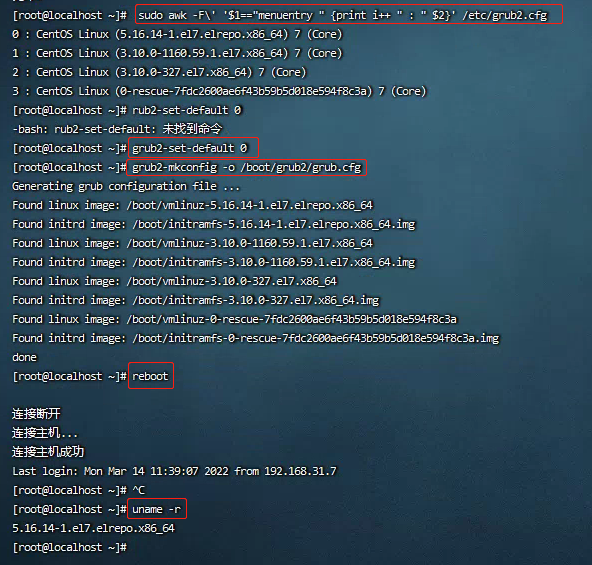
[root@localhost ~]# sudo awk -F\' '$1=="menuentry " {print i++ " : " $2}' /etc/grub2.cfg
0 : CentOS Linux (5.16.14-1.el7.elrepo.x86_64) 7 (Core)
1 : CentOS Linux (3.10.0-1160.59.1.el7.x86_64) 7 (Core)
2 : CentOS Linux (3.10.0-327.el7.x86_64) 7 (Core)
3 : CentOS Linux (0-rescue-7fdc2600ae6f43b59b5d018e594f8c3a) 7 (Core)
设置新的内核为grub2的默认版本
服务器上存在4 个内核,我们要使用 4.18 这个版本,可以通过 grub2-set-default 0 命令或编辑 /etc/default/grub 文件来设置
方法1、通过 grub2-set-default 0 命令设置
其中 0 是上面查询出来的可用内核
grub2-set-default 0
方法2、编辑 /etc/default/grub 文件
设置 GRUB_DEFAULT=0,通过上面查询显示的编号为 0 的内核作为默认内核:
$ vim /etc/default/grub
GRUB_TIMEOUT=5
GRUB_DISTRIBUTOR="$(sed 's, release .*$,,g' /etc/system-release)"
GRUB_DEFAULT=0
GRUB_DISABLE_SUBMENU=true
GRUB_TERMINAL_OUTPUT="console"
GRUB_CMDLINE_LINUX="crashkernel=auto rd.lvm.lv=cl/root rhgb quiet"
GRUB_DISABLE_RECOVERY="true"
生成 grub 配置文件并重启
[root@localhost ~]# grub2-mkconfig -o /boot/grub2/grub.cfg
Generating grub configuration file ...
Found linux image: /boot/vmlinuz-5.16.14-1.el7.elrepo.x86_64
Found initrd image: /boot/initramfs-5.16.14-1.el7.elrepo.x86_64.img
Found linux image: /boot/vmlinuz-3.10.0-1160.59.1.el7.x86_64
Found initrd image: /boot/initramfs-3.10.0-1160.59.1.el7.x86_64.img
Found linux image: /boot/vmlinuz-3.10.0-327.el7.x86_64
Found initrd image: /boot/initramfs-3.10.0-327.el7.x86_64.img
Found linux image: /boot/vmlinuz-0-rescue-7fdc2600ae6f43b59b5d018e594f8c3a
Found initrd image: /boot/initramfs-0-rescue-7fdc2600ae6f43b59b5d018e594f8c3a.img
done

[root@localhost ~]# reboot
6、验证
[root@localhost ~]# uname -r
5.16.14-1.el7.elrepo.x86_64
7、删除旧内核(可选)
查看系统中全部的内核:
$ rpm -qa | grep kernel
kernel-3.10.0-514.el7.x86_64
kernel-ml-4.18.7-1.el7.elrepo.x86_64
kernel-tools-libs-3.10.0-862.11.6.el7.x86_64
kernel-tools-3.10.0-862.11.6.el7.x86_64
kernel-3.10.0-862.11.6.el7.x86_64
方法1、yum remove 删除旧内核的 RPM 包
$ yum remove kernel-3.10.0-514.el7.x86_64 \
kernel-tools-libs-3.10.0-862.11.6.el7.x86_64 \
kernel-tools-3.10.0-862.11.6.el7.x86_64 \
kernel-3.10.0-862.11.6.el7.x86_64
方法2、yum-utils 工具
如果安装的内核不多于 3 个,yum-utils 工具不会删除任何一个。只有在安装的内核大于 3 个时,才会自动删除旧内核。
安装yum-utils
$ yum install yum-utils
删除旧版本
package-cleanup --oldkernels
转载说明
文章是转载的,版权归原作者所有,如果侵权,请联系本人删除,邮箱:dove#jinzhijun.cn
原文:Centos7 升级内核版本:https://www.cnblogs.com/xzkzzz/p/9627658.html
原创文章,作者:Zeyu,如若转载,请注明出处:https://jinzhijun.cn/develop/1008
